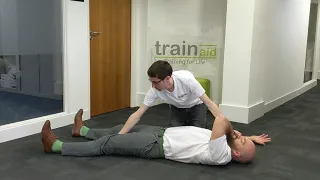
The recovery position is used to help keep the airway open and free from obstructions. It is suitable when leaving a casualty to get help and also when awaiting the arrival of the emergency services.
Step By Step
Remove any glasses and bulky items from the pockets
Place the near side hand above the shoulder on the floor
Bring the far hand over so that the knuckles rest against the nearside cheek
Lift the far leg to a 90 degree angle so that the foot is flat on the floor
Place one hand on the outside of the knee, the other palm to palm and gently roll towards you
Hook the far leg over towards you for extra balance
Pull the shoulder so the casualty is right the way over
Finally lift the chin onto the hand to help maintain an open airway
It’s always advisable to roll the casualty towards you and this is also the safest way to support the head
When Not to Use
The general rule is to place all unconscious casualties in the recovery position. However below are some key times when it is best to avoid using the recovery position
When a major head or spinal injury is suspected
Broken legs or ankles
Broken pelvis
However the airway is always of the highest priority. If blocked it is advisable to roll a person into the recovery position (irregardless of their injuries). Consider a first aid course to learn how to safely move a person using a modified recovery position or log roll.
.jpg)
.jpg)